Loading... ## 方法一 ``` RAR registration data utf8:Blush Single PC usage license UID=5f91866d5de5aa1d478e 6412212250478eb187103c5362bf06f2fdfe0f17f507d3622b7e36 631bec33cce4eef6bee46023b5f01b45ebcb3de49aae9f6e8372a9 4594ad31b2ed961c7593873d2e413b807e1df6b6a76b36632ee065 057850b38e1021dbc6079d3e575def5cea6025cf5b5c68348b7ba3 cbd32f32cb1d0598c165f255cb6ad89e0f265b06be3b807e1df6b6 a76b3662645b4f2ee9b40276e7e97e8382bb70b7596491a0607c6d 15617c4f5b92300bea12ca8763695ec665b1b309fb450880001679 ``` 步骤 1:新建文本文档,复制上面的内容进去 步骤 2:重命名文档为rarreg.key 步骤 3:转到 Winrar 安装目录(默认情况下安装路径为`C:\Program Files\WinRAR` ) 步骤 4:将 rarreg.key 粘贴到 WinRAR 目录中步骤 步骤 5:打开Winrar.exe,依次点击 帮助-->关于Winrar,查看许可情况 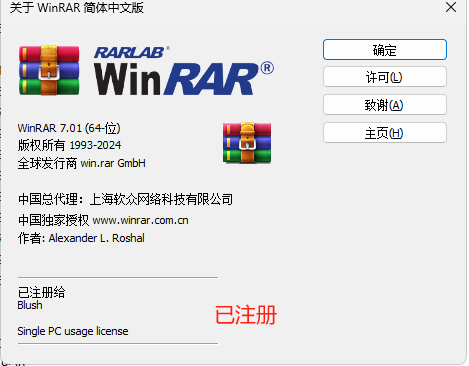 用户名和公司信息可以自行设置,rarreg.key生成参考 [https://github.com/bitcookies/winrar-keygen/tree/master]([https://](https://github.com/bitcookies/winrar-keygen/tree/master)) 简体中文**商业版**(以 6.24 和 7.01 版本为例): ``` 6.24 https://www.win-rar.com/fileadmin/winrar-versions/sc/sc20231013/wrr/winrar-x32-624sc.exe https://www.win-rar.com/fileadmin/winrar-versions/sc/sc20231013/wrr/winrar-x64-624sc.exe 7.01 https://www.win-rar.com/fileadmin/winrar-versions/sc/sc20240528/wrr/winrar-x32-701sc.exe https://www.win-rar.com/fileadmin/winrar-versions/sc/sc20240528/wrr/winrar-x64-701sc.exe ``` 简体中文**广告版**(以 6.24 版本为例): ``` win-rar 渠道: https://www.win-rar.com/fileadmin/winrar-versions/winrar/winrar-x32-624sc.exe https://www.win-rar.com/fileadmin/winrar-versions/winrar/winrar-x64-624sc.exe rarlab 渠道: https://www.rarlab.com/rar/winrar-x32-624sc.exe https://www.rarlab.com/rar/winrar-x64-624sc.exe ``` ### 定制专属的rarreg.key * **Fork** 代码到你的 Github上[https://github.com/bitcookies/winrar-keygen/tree/master]([https://](https://github.com/bitcookies/winrar-keygen/tree/master))  * 启用**Actions**,允许 workflows 在你的 fork repo 中运行 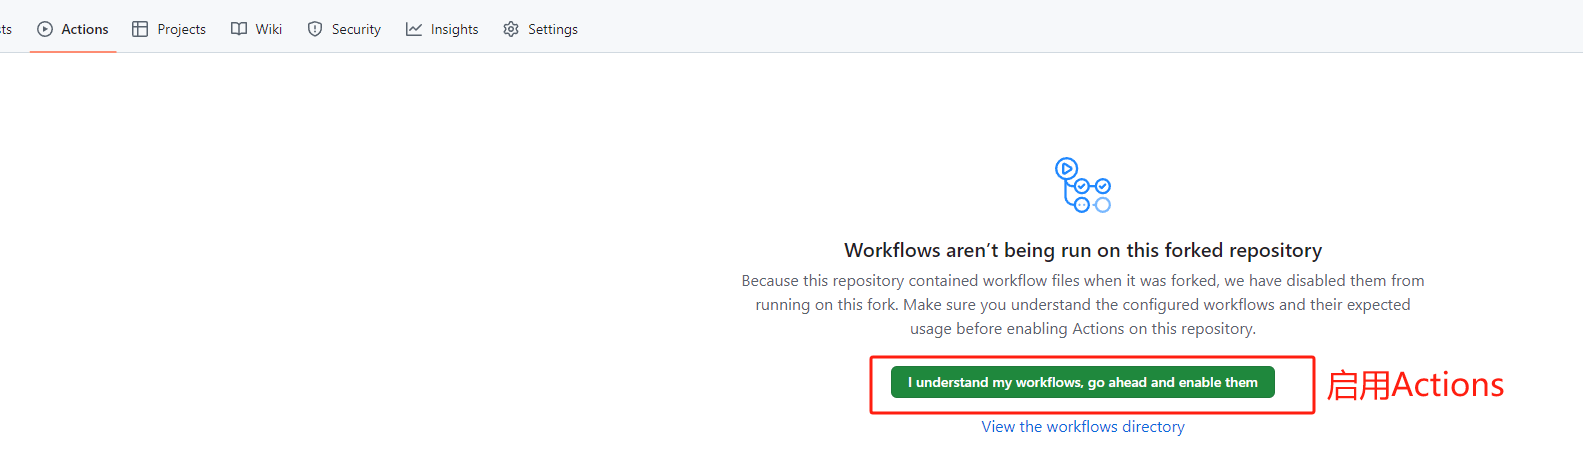 * 创建 **secrets**,允许 workflows 后,进入 **Settings > Secrets and variables > Actions > New repository secret** 来创建 secrets 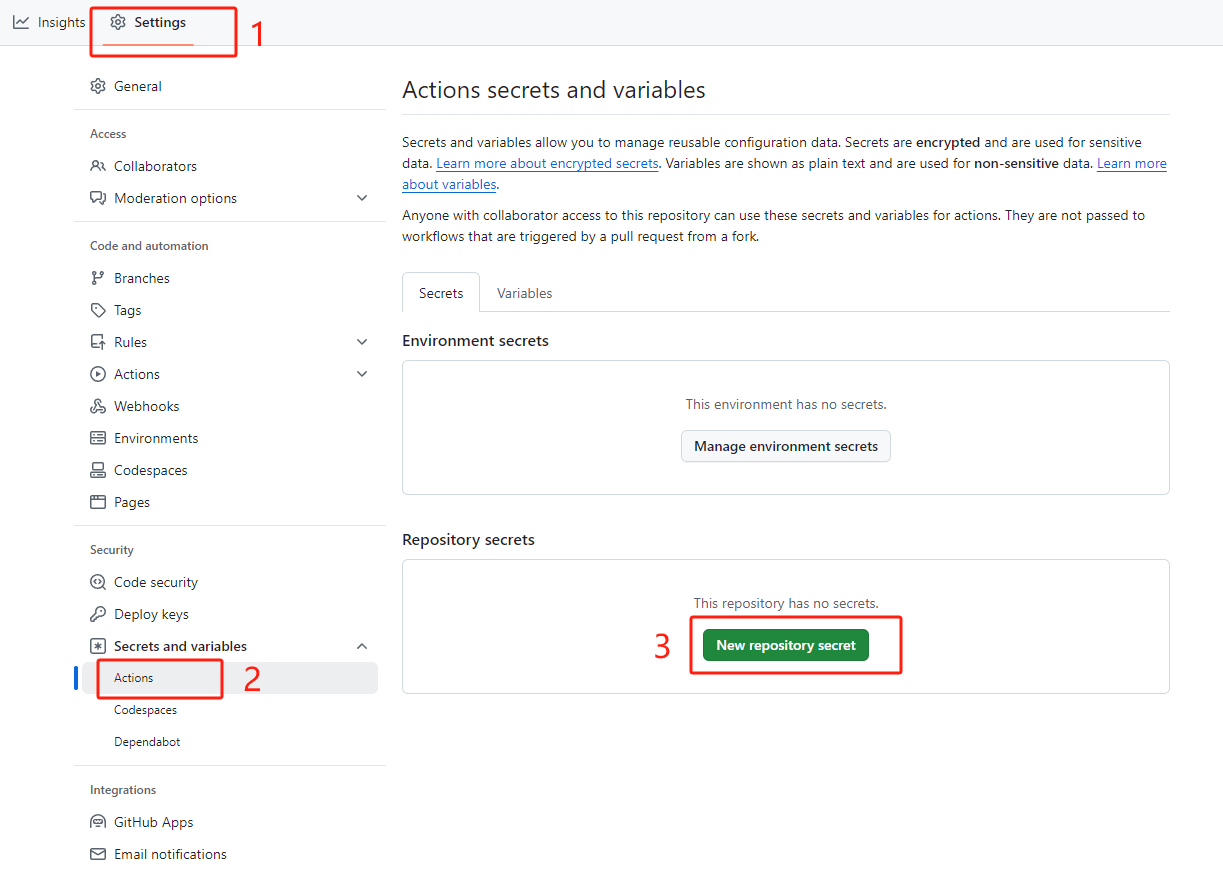 * 创建三个 secrets,名称为 `TEXT1` 、 `TEXT2` 和 `PWD`,并填入相关值: > 填入的值应与你选择的编码类型保持一致。 | Secrets Name[![]()](https://github.com/bitcookies/winrar-keygen/blob/master/README.zh-CN.md) | Explanation[![]()](https://github.com/bitcookies/winrar-keygen/blob/master/README.zh-CN.md) | | -------------------------------------------------------------------------------------------- | ------------------------------------------------------------------------------------------- | | TEXT1 | 用户名 | | TEXT2 | 许可名 | | PWD | 压缩包密码 | 示范填写:`TEXT1=Blush` `TEXT2=Unlimited Company License` `PWD=123` 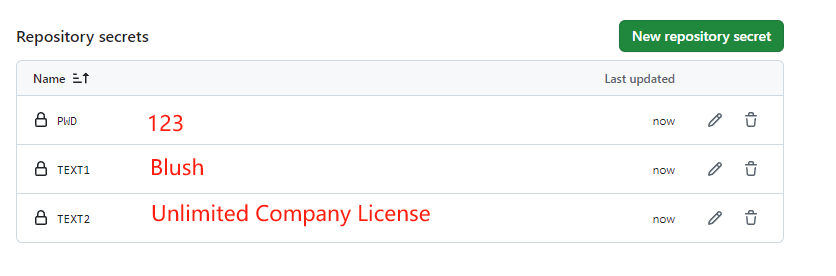 * 运行 **workflow** 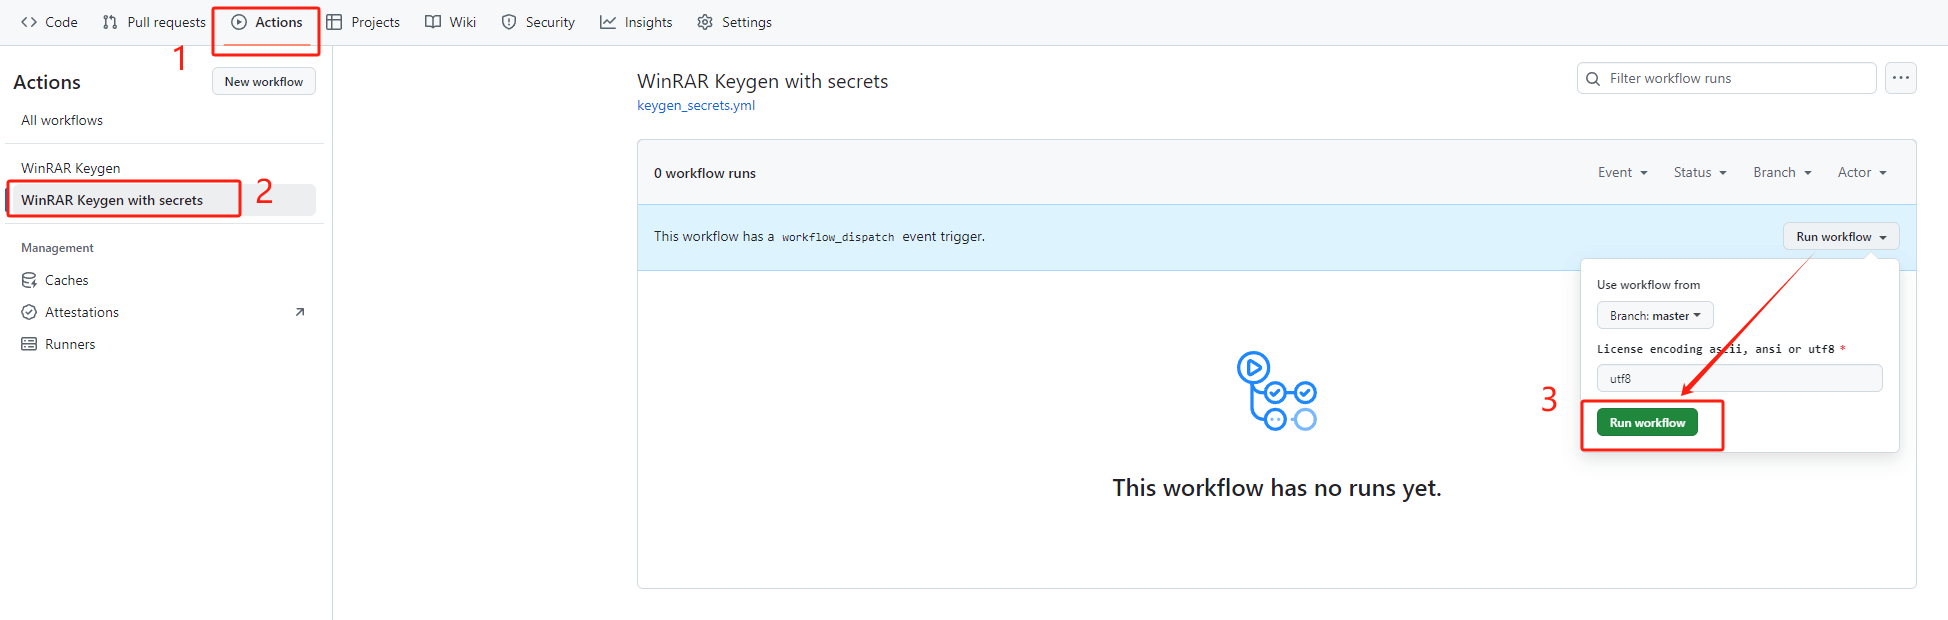 运行成功之后,打开对应的任务,选择 **rarreg\_file** 下载解压密码为设置好的123 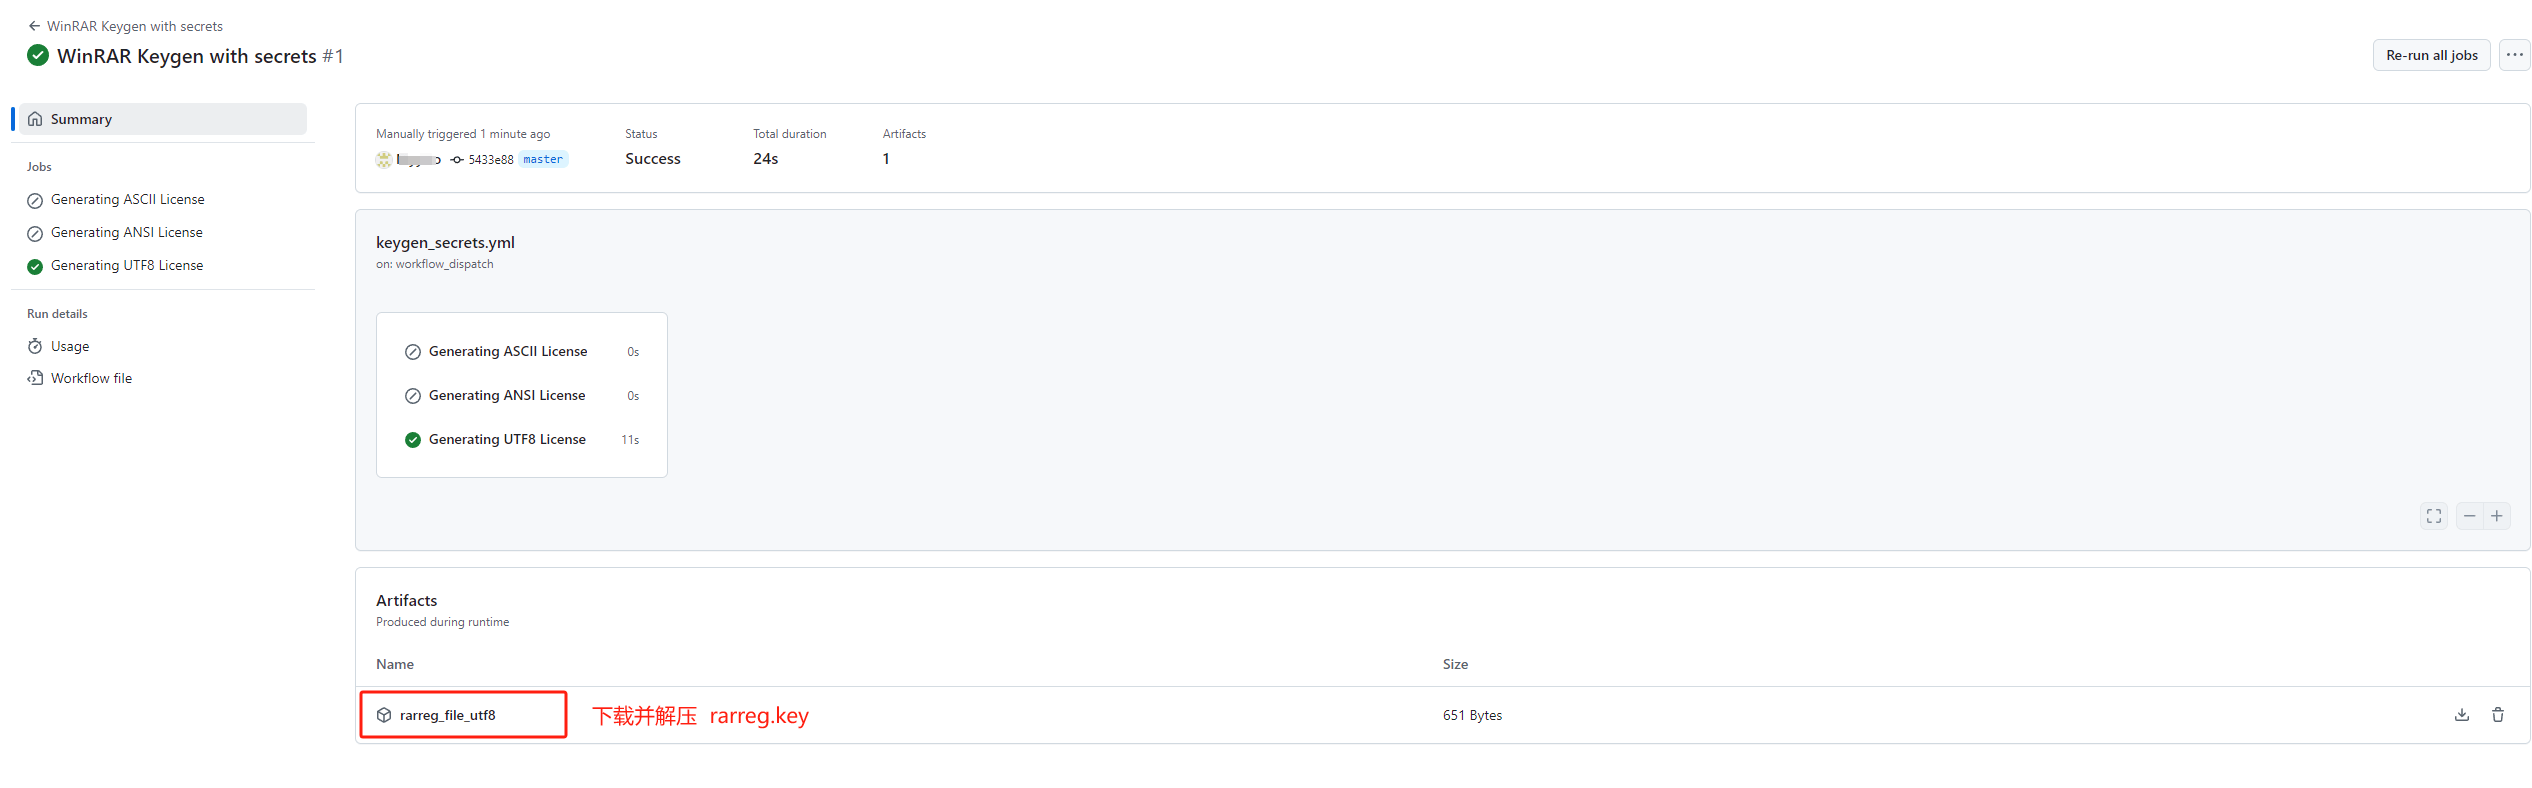 * 最后生成的rarreg.key,复制到Winrar目录径下,再次查看信息,就是刚刚填写的信息 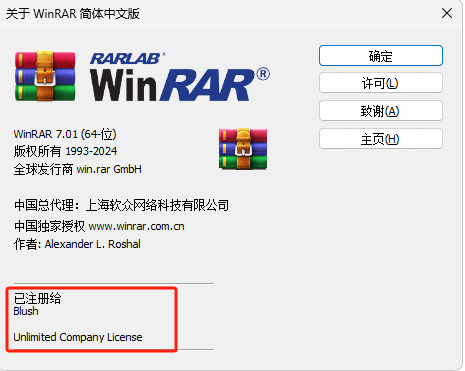 ### 通过Google查询rarreg.key在线生成网站 [https://winrar.netlify.app/](https://winrar.netlify.app/) 最后修改:2024 年 10 月 14 日 © 允许规范转载 打赏 赞赏作者 支付宝微信 赞 4 如果觉得我的文章对你有用,请随意赞赏
